3D Printing
All OWL enclosures and mounts can be 3D printed. This page provides the STL files, print settings, and guidance for both the Original OWL and Compact OWL designs.
Original OWL
There are seven total items that need printing for the Original OWL unit. All items with links to the STL files are listed below. There are two options for Original OWL base:
Single connector (Bulgin) panel mount
Pros: Easy/quick attach/detach from whatever you have connected, more water resistant.
Cons: More connections to make, more expensive
Cable gland
Pros: Fewer connections to make, cheaper, faster to build.
Cons: More difficult to remove, less water resistant.
We also provide a link to the 3D models on TinkerCAD, an online and free 3D modelling software package, allowing for further customisation to cater for individual user needs.
Original OWL Parts List
Description |
Image (click for link) |
|---|---|
Original OWL |
|
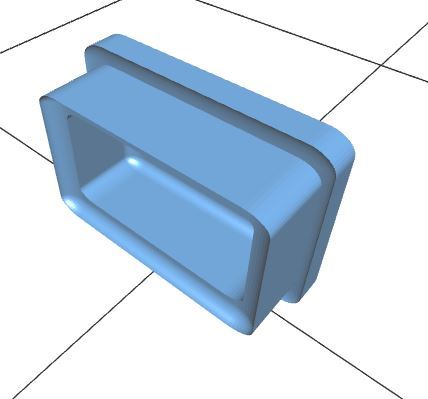
OWL base, onto which all components are mounted. The unit can be fitted using the M6 bolt holes on the rear panel. |
|
OPTIONAL: OWL base with cable glands instead of single Bulgin connector. |
|
OWL cover, slides over the base and is fitted with 4 x M3 bolts/nuts. Provides basic splash protection. |
|
OWL base port cover, covers the cable port on the rear panel. |
|
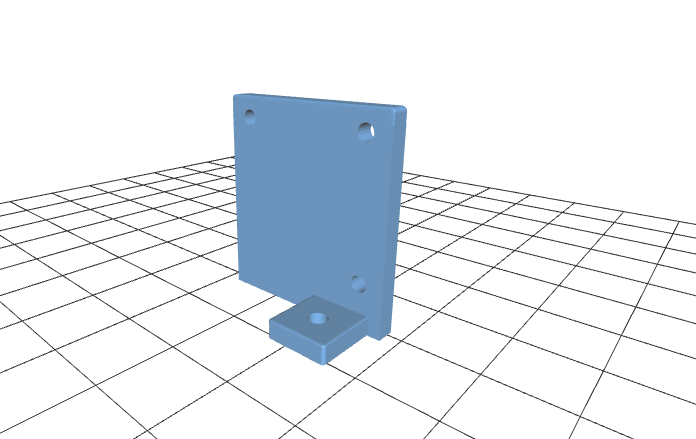
Raspberry Pi mount, fixes to the Raspberry Pi for easy attachment to OWL base. |
|
Raspberry Pi Camera mount, fixes to the HQ or V2 Camera for simple attachment to the base. |
|
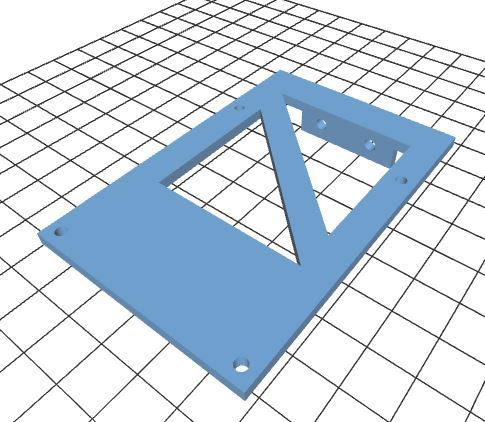
Relay board mount, fixes to the relay board for simple attachment to the base. |
|
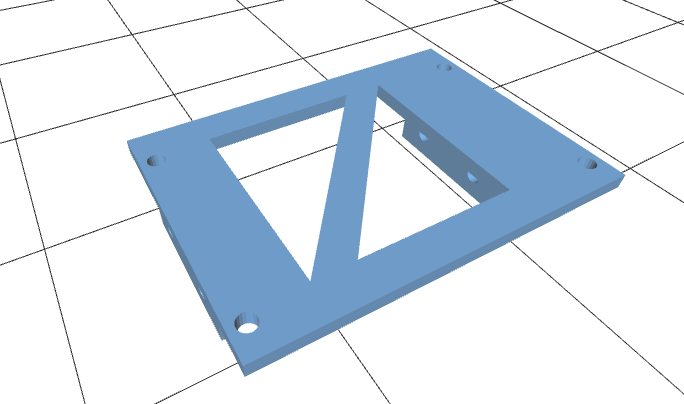
Voltage regulator mount, fixes to the voltage regulator and onto the relay board for simple attachment to the base. |


Print Settings - Original OWL
Ideally supports should be used for the base, and were tested at 0.2mm layer heights with 25% infill on a Prusa MK3S.
Setting |
Value |
|---|---|
Layer height |
0.2mm |
Infill |
25% |
Supports |
Yes (for base) |
Tested printer |
Prusa MK3S |
Update 02/05/2022
Improved camera mounts
Space for 40mm lens cover
More compact design
Version tracking
Compact OWL
The Compact OWL has fewer parts to print than the Original OWL and is both more durable and water resistant. A complete unit requires printing of only 5 parts.
All 3D model files are available to edit and download on TinkerCAD or Printables. The 3D printing .stl files are provided under the 3D Models and through the links in the table below.
The backplate comes in three options:
Amphenol EcoMate Aquarius receptacle only
Amphenol EcoMate Aquarius receptacle + Adafruit RJ45 waterproof ethernet connector
16mm cable gland only
Pick one of these backplates when printing.
Compact OWL Parts List
Description |
Image (click for link) |
|---|---|
Compact OWL |
|
Enclosure body: houses all components on tray |
|
Frontplate: covers the front of the enclosure. Incorporates a 37 mm lens cover to seal the enclosure. |
|
Lens mount: Securely mounts the 37 mm UV lens filter to the frontplate. |
|
Backplate: 1 x Amphenol EcoMate Aquarius Receptacle size 10 shell, 1 x size 12 shell |
|
Backplate: 1 x Amphenol EcoMate Aquarius Receptacle |
|
Backplate: 1 x Amphenol EcoMate Aquarius Receptacle, 1 x Adafruit Ethernet Connector |
|
Backplate: blank |
|
Backplate: 1 x 16mm Cable Gland |
|
Tray: Mounts all required hardware and fits into the enclosure body on the second rail. Use M3 heat-set threaded inserts for the lens holder. |
|
Lens holder: Secures the lens with two M3 x 6mm screws. |
|
OPTIONAL: Camera Module 3/V2 Camera mounting plate |
Print Settings - Compact OWL
All .stl files for the 3D printed components of this build are available in the 3D Models directory. Supports are not required but do improve print quality.
Setting |
Value |
|---|---|
Layer height |
0.16mm |
Infill |
25% |
Supports |
Optional (improves quality) |
Tested printer |
Bambu Labs P1S |
Controller Enclosures
3D printed enclosures are also available for the OWL controllers. See the Controller Setup Guide (coming soon in the Software section) for more details on building controllers.
Ute Controller
Advanced Controller
General Printing Tips
3D Printing Recommendations
Material: PLA or PETG recommended for enclosure parts
Orientation: Print bases with the open side facing up
Supports: Required for base pieces, optional for other parts
Post-processing: Sand mounting surfaces for better fit
Threaded inserts: Use a soldering iron to set heat-set inserts
Next Steps
After printing your enclosure parts:
Original OWL Assembly Guide - Complete build instructions for the Original OWL
Compact OWL Assembly Guide - Complete build instructions for the Compact OWL
Software Installation - Install and configure OWL software